Tuesday, May 31, 2011

Going green, one page at a time

I'm a bit of a slow mover when it comes to converting my lifestyle to being 'greener'. I recycle my cans & bottles, and reuse them when I can, gave cleaning with vinegar a try, shop at thrift stores and flea markets. Now I have a Pinterest account. I'm not convinced that this will replace my need for magazines and the satisfaction of tearing and book marking pages (sometimes whole sections). Kind of like how e-readers can't quite replace the joy of reading a old book with worn pages with scribbled notes and underlinings. But maybe, just maybe it will keep me from tearing pages out of magazines and instead I can pin them on one of my Pinterest moodboards and then I can pass my magazines around to friends to borrow or donate them to a doctors office or something. Maybe. Just maybe.


GO GREEN,

BUY VINTAGE
 

Saturday, May 28, 2011

ROADTRIP!!

So I owe you all a little-bitty update on my life...in a few weeks the hubs, doggie & I are heading out in the truck for a tour of the west half of the U.S. We won't be doing Alaska or Hawaii however...

Left My Heart Print

We went to Hawaii on our honeymoon and we will do Alaska another time (He says the camping is great, but everytime he talks about his visit there its all about the many bears he saw...hmm...I'm not convinced). And I'm not too sure if we will get into Texas, Oklahoma, Kansas, Nebraska or the Dakota's either. Depends on how much time we spend getting to that area, we have a few set weeks where we will be visiting family, so those are really the only "for sure's". Cody (my hubby) has this interesting request: we don't travel outside the country till we've seen all of our own...So the all-inclusive mexican getaway of my dreams is going to have to wait a while. Here's the general plan for our 10 WEEK TRIP!!!

For the most part we will be visiting National Parks and other various state landmarks. So I have no idea how often I will have internet service, hopefully 1/week, most likely at good old Starbucks. Anywho, as we are taking a slight detour in life and many I'm sure on the trip, this blog is taking a detour too. Just wanted to give you all a little FYI!

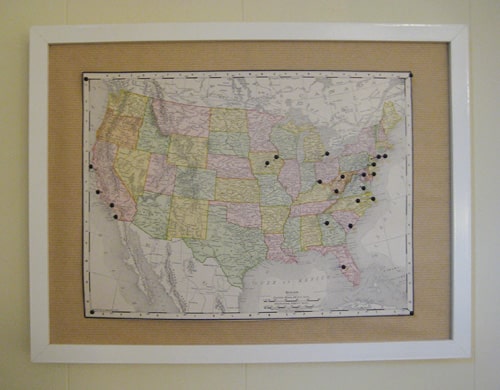
All this roadtrip planning has definately got me going on lots of ideas however. For one, my latest scrapbook is going to be my roadtrip journal (more updates on completing that project to come). And I've been super inspired by another blog's fascination with maps and all the decorating possibilities they have. Like this picture below:

vintage-framed-map-pin-board-frame-art-travel-project-how-to-diy-cheap
(original idea from younghouselove.com)

And then I found all these other fun maps on Etsy! I want them both...badly....
 

11x14 - Map of U.S. featuring California - print

Stay tuned for updates on our crazy adventure!!!

Thursday, May 26, 2011

Moving Sense

 We're moving to another home again and I thought I'd post a quickie moving tip: LABEL EVERYTHING. I'm sure most of you already do this, but I am so learning the important of this right now. In an effort to be proactive and not be the crazy lady running around thowing things in boxes at the last minute, I started packing waaay early--like 3 weeks before moving. My plan was to pack things I don't use all that often. Well, I packed a really cute pair of shoes early. And now I have to live without them for a few weeks since they're already in storage. BUMMER. This did get me thinking though on how to make moving a bit less stressful. One biggie is to label all your boxes with the following: which room it belongs to (kitchen, bath, etc.), contents (pots & pans, purses--yes I have a whole box of purses...) and if its breakable (as in GLASS!). Here's what I mean for those of you visual learners like myself:


Also, in an effort to possibly use less boxes, I've been making my towels work (kitchen & bath & cleaning) by wrapping the breakables in them. You could also use placemats, tablecloths, cloth napkins, etc. for this double duty. Hopefully it works--my little helper is looking concerned...


Tuesday, May 24, 2011

Eyeglass Drawer Pulls

Transforming junk into something useful & non-cluttery makes me feel so green. :) Here's a fun little project I came across--DIY drawer pulls. Putting a personal touch on your furniture, whether store bought, hand-me-down or thrift find is a must. Customizing through hardware such as a drawer pull is a quick option and it's super easy, you don't even need power tools!

So for this project you will need the following (I haven't actually done this myself yet, but here is what I would gather to get it going): Several pairs of old eyeglasses, paint (in case you're good at that sort of thing), paper of varied texture & colors (tissue paper, magazine clippings, etc), mod podge (for decoupaging), scissors and krazy glue (to glue your new knob on top of the one already on the drawer).
                  
Old eyeglasses $3.99 (Goodwill)
I would look for Harry Potter style round glasses, but that's just me :)

And here's an example of all an eyeglass can be!

I really love this idea. I will certainly post photos & tips when I actually get around to doin' it!

Saturday, May 21, 2011

Goodwill Glassware

I always like to stock up on a few spare vases  for when I give flowers as a gift. It's awkward to have them wondering if the vase was part of the gift too. So to avoid any confusion, I make sure to tell them "Keep the vase!". To keep this from getting pricey, I get my spare vases from the Goodwill. They're usually about $1 each, and you totally wouldn't know it! Sorry to spoil it those of you who I've given flowers too! :) These vases below though, wow, aren't they fabulous? They're $2.49 each, certainly more than I typically like to spend, but man I think they are definately worth it! Plus, there a bit smaller so I won't be spending as much money on flowers to fill them with. And it's a great way to "Make it work!" as Tim Gunn would say :)


This pitcher set below also caught my attention. Honestly, I don't care too much for the glasses, they are more suited for votive candles than drinks due to their size, but the pitcher is really striking. The whole set was listed for $7.99. Not bad, not bad at all.

So if you weren't convinced before, you certainly know now that your local Goodwill is worth a visit! Would love to hear what you guys have found as well. Happy Hunting!


Thursday, May 19, 2011

Scrapbook from Scrap

I somehow convinced myself that making a scrapbook from scrap up would be a brilliant idea. I've just barely begun, but so far it's actually working out quite well for somebody who has a tendancy to become all thumbs.  Here is the beginnig of a story bound to have many chapters ;)
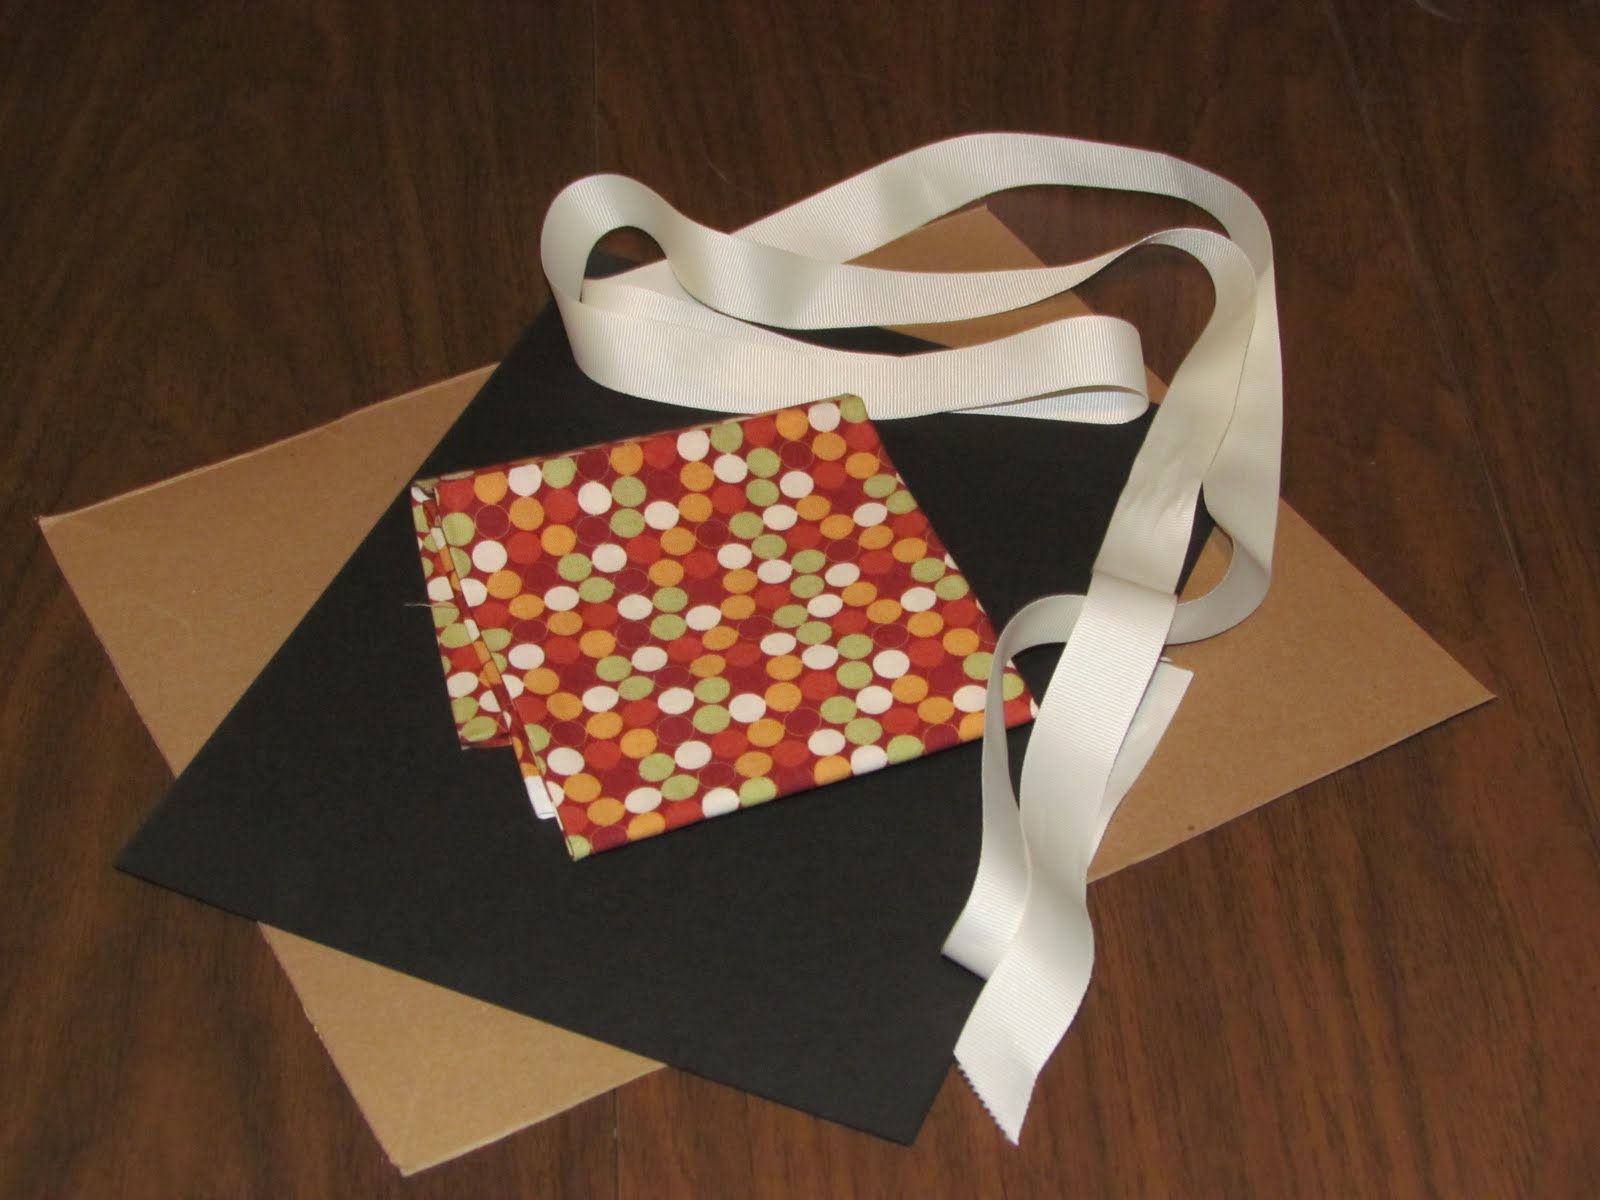
1. Gathered supplies: 2 pieces of Cardboard (thin, soda box type which I cut to be slightly larger than standard paper size), two fat quarters in polka dot print, black cardstock and grosgrain ribbon. I already owned these items, making this a (so far) F-R-E-E project. 
2. Whipped out my best buddy Hot Glue (a must for anyone who has nightmares of sewing machines...one day I WILL WIN!) and wrapped one fat quarter around piece of cardboard present-wrapping style.
3. Hot glued a piece of black cardstock to the inside for a stiff cover & to cover fabric edges.
4. Hot glued gross grain ribbon on the back cover so I can wrap it around to the front for decorative closure.
5. Assembled the inner workings of the scrapbook: 3-hole punched more black cardstock for pages and threw in a few plain envelopes in different sizes just for variety. I bought a package of binder rings ($3.99 for a package of 6 --which means I get to make TWO books--and then used the good old 40% coupon at Michaels).
6. And here's my book all tied up and ready to be filled with photos and memories.
I have yet to punch holes in the cover to actually make it a connected book. Truth be told, I'm reaalllyyy nervous that I'm going to mess it up, especially since I've had no stumblings in the project so far. A dreaded "oops!" moment is lurking around the corner. So now I'm on the hunt for binder ring size grommets to protect the fabric from unraveling when I work up the courage to finish this stage of book-making. Anyone done this before?

Monday, May 16, 2011

DIY Bachelorette Sash

Threw a final shabang for a good friend over the weekend and decided to make a bridal sash because she is just too classy for those obnoxious store-bought wild colored versions :) Ok, I know, they have their place but I just wanted to make sure she was feeling super glam on her final weekend of freedom. So here it is!!
1. Folded tulle to about 6 inch width, wrapped it around myself to get a length I liked.
2. Then folded the ends over and sewed it together to make a loop.
3. Grabbed a ribbon topper from Michaels ($3.99 & got to use my 40% coupon on top of that! Booyah!!)
4. I tacked this down onto the sash with a few stiches, it also helped hold together the layers of tulle.
I had a silver scripted "Love" sticker that I put in the middle to give it some shimmer. And voila for $2.42 a Classy & Glam Bachelorette Sash!