Thursday, April 28, 2011

Oh, put a cork in it!

A quick addition to my post about upcycling glass jars/wine bottles. I found a couple super fun ideas to re-use all those wine bottle corks! Check it out!!!


 Wine Cork Serving Tray, large
Wine Cork Serving Tray
Draw letter on tray with white chalk.
Cut corks in half with craft knife and glue ends down to the pencil outline on tray, using the wine stained part of the cork.
Glue remaining corks on their sides to fill the entire base of the tray. Cut corks where necessary to fit. Let dry.
Using paintbrush, apply black acrylic paint to the ends of the corks that form the monogrammed letter. Let dry.
Hang on the wall for a place to pin messages or use as a decorative tray.
Tip: Use computer to find font of choice for letter monogram. Print out and enlarge to use as a pattern to guide drawing of letter onto tray.
Monday, April 25, 2011

I love Ombre

I'm not the most gifted when it comes to actually making something vs dreaming & shopping for it. Let's just say I prefer the 'natural look' of things...I can't cut a straight line or draw one for that matter. And I'm terrible at following directions, I always think "I know a better way" even when it's my first go-around. I prefer to just look at a picture or two and then just have at it. So when I see projects that are accepting of imperfections, in fact it's expected and part of the look, I get really excited! Right now I've got ombre on the brain. Take a look at this project and see how easygoing, forgiving and gorgeous it is! Tip: This same technique can be used on countless items--think scarves, tote bags, towels, table linens, bath mats, floor runners, pillow cases, throw blanket, linen pants, canvas sneakers, hats (baseball or beanie!) or even dip dye your own stationary!


Dip-Dyed T-Shirt


How to Dip-Dye with Fabric DyeWe used Rit liquid dyes in Denim and Navy (ritdye.com). You can combine colors for custom shades. This technique can be adapted for unfinished wooden items and bamboo blinds (let them dry on paper towels), and paper (let the dye solution cool before dipping paper).
Tools and Materials
  • Sheer jersey long-sleeve T-shirt, in White, $26, americanapparel.net
  • Large plastic storage bin or galvanized-steel bin
  • Stir stick
  • All-purpose liquid dye
  • Sample fabric or paper towel
  • Sewing pins
  • Synthrapol detergent (optional)
How-To
1. Wash and dry fabric to remove any finishes that resist dye. Fill plastic bin with hot water to a depth of at least 6 inches. Stir in dye, starting with a small amount and adding more as desired. Dip a sample strip of fabric or paper towel to test the color. If too dark, add water; if too light, add dye. Let solution settle, so there are no bubbles at the surface.
2. Determine where you want the top of the dyed band to be; use pins to mark that line on fabric. Holding your fabric as straight as possible, dip into dye solution to just below the pin line (make sure you don't dip the pins; the fabric will wick the dye higher). Keep fabric in dye until it turns the desired color (it will dry slightly lighter). Rinse fabric in cold water to remove excess dye until the water runs clear. Hang to dry. If desired, wash item with synthrapol detergent (see Keep it Bright, below).
Keep It BrightFor items you plan to launder, set the colors by washing the finished objects in synthrapol detergent (dharmatrading.com). This concentrated, pH-balanced detergent will keep the dye from bleeding onto undyed parts of the fabric


Read more at Marthastewart.com: Dip-Dyed T-Shirt - Martha Stewart Crafts

Saturday, April 23, 2011

Style Quiz!!

I ABSOLUTELY LOVE THESE THINGS! I usually get quite a variety of labels which leaves me confused. But I always take the next one I come across thinking "this is it!" My one foundation is that I never, ever, ever get MODERN. Well at least that's taken care of. This quizzy breaks it down by percentage, which is perfect for an indecisive individual like myself! Check it out at sproost.com!!

 I got 38% Nantucket Style (AKA Beach style)
84

38% Rustic Revival (can't hide the country side of me!)
Rustic Revival

And 24% Southwestern--this was a fun little surprise! But it does tie in nicely with Rustic Revival, think iron, leather, riding horses...yep I'll take it!
99

Now I just need to tie it all in together for a Nantucket/Rustic/Southwestern home...

I am noticing a few similarities, neutral bases/couches/walls (although I have always envisioned owning a denim couch someday, I will figure out a way to work that in somehow) with splashes of easy-on-the-eyes colors in pillows, rugs & accessories. Natural light, some symmetry, mirrors, fireplaces, a genuine 'lived in' look. And lots and lots of wood furniture, architectural details & craftsmanship throughout. This will justify my obsession with flea markets and vintage shops! Just gotta come up with a cool name for it! American Eclectic? That'll do for now :)

Thursday, April 21, 2011

Oh, Pickle Jar!

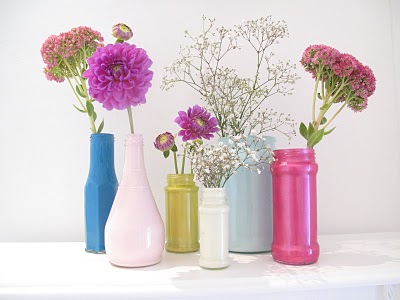
I've begun to keep the glass jars from jam, pickles, wheat germ, wine...you get the idea, for something. I'm not quite sure what yet, they seem like the perfect blank canvas and I can't bear to throw them out!  Just do a thorough cleaning and soap soak to get the smell out of the jar--especially if it was a pickle jar! Then let it sit in water to easily remove the label. There's so many things you can do with those things! Here are some of the ideas I've been daydreaming of:

1. Use the jar to store your own jam or home-made pickles, etc.
2.  Candle holders--drop a tealight or votive inside for rustic lighting.
3.  Cover the lids of the jars with paper or fabric and use for visible storgage--think dry kitchen items, office supplies, buttons, cotton balls and safety pins!
4. Fit the lid for a soap pump.
5. Use it as a vase, you could also paint the inside of the jar for a solid or patterned custom vase.
6. Photo holder--slide a photo to fit inside the curve of the jar.
7. Drinking glasses, just like a your favorite BBQ restaurant.
8. Utensil holder, use a large one for cooking utensils or smaller one for forks/spoons for your next backyard party.

One of these days I will get around to making a few of these to share with you, for now I will just keep on collecting and hiding them in the cupboard!


Thursday, April 14, 2011

Cupcake CRAZY!

Recently my friends and I were inspired to get a handle on cupcake decorating. The smaller surface (compared to a cake) makes them so much more approachable and experiment friendly! Quick tip: bake the cupcakes for 15 minutes per batch--this will keep them moist! Here are some  of our cupcake trials...

             Tried to create white chocolate piping details here, experiment with thickness so that your designs hold up when you transfer them to the cupcakes! Also, this was a whole bottle of red dye in one can of frosting to get this shade of pink! Certainly enough to stain your teeth, probobly not what you want to do to your guests!

Round Two: Keep the icing simple! Here I used a 1" punch and a stamp to create this alternative way to bring color to the cupcake.  And you gotta love sugar pearl sprinkles!


I found it's much easier to frost with a bag vs the cookie press tool. It helps keep my frosting in a fluid, solid, consistent line.  For the day of the shower (our deadline for perfecting our frosting skills) we used the bag and just cut a hole in the corner of the bag instead of using a frosting tip.


It's a scarf! It's a purse!

I'm sure my purse weighs at least 10 pounds. Not so bad considering everything I have in there! But when you literally carry it EVERYWHERE it gets to be a bit cumbersome. I have a habit--as I'm sure many of us do--of buying cute little purses for use on evenings out when I don't need my "emergency kit". The problem is I don't think about using them until I've already left the house. I have found a solution! Grab a scarf and two bangles--or pick 'em up next time you go to the flea market. Lay out your scarf, fold 'hot-dog style' and knot 2 corners on each bangle.  Grab a few of your favorite things out of your every-day-purse and get on with your fun day! I originally found this idea on http://www.marthastewart.com/ (called Knotty and Nice Bags). You could also keep a scarf and two bangles in your every-day-purse and you'll always be ready to lighten your load. Plus, it's easy to change out scarves for a new look anytime you feel the need. Not to mention scarves are a great punch of pattern and color to kick your fashion up at least 3 notches. They're also much more affordable than buying a bunch of individual purses and easier to store, which means they will be easily accessable when it's time to change it up.